Navigation bar

Monday, May 03, 2010

BMW Style 5 (BBS RC090): Break Down


Tools needed:

  • 3/8" Ratchet/Breaker bar- Do I need to explain this?
  • 10mm 12 point socket- to remove the nuts from the back side of the wheel.
  • 10" socket extension- to be able to reach all the way in to the wheel
  • Nail punch- this is to tap out all the bolts after removing the nuts. I used an old Torx screwdriver that I found lying around the apartment for the last wheel it was tons better because it had a rubber handle and would center itself on the bolt.
  • Old phone book- Place this on the top of the center to protect the finish.
  • A dead blow hammer- I used a regular hammer, because my rubber mallet just wasn't doing the trick.
I started out by soaking the inside of the wheel with WD40. I thought this would penetrate between the center and wheel to help me when I wanted to separate the two. Now, after they have soaked a little bit, you can start by removing all the nuts from the back of the wheel. This takes some patience, there are 34 bolts per wheel. I worried that I would break a bolt as some of the nuts were very stubborn and necessitated using the "persuader"--or 26" breaker bar. I collected them in a magnetic dish to keep them all in one place.
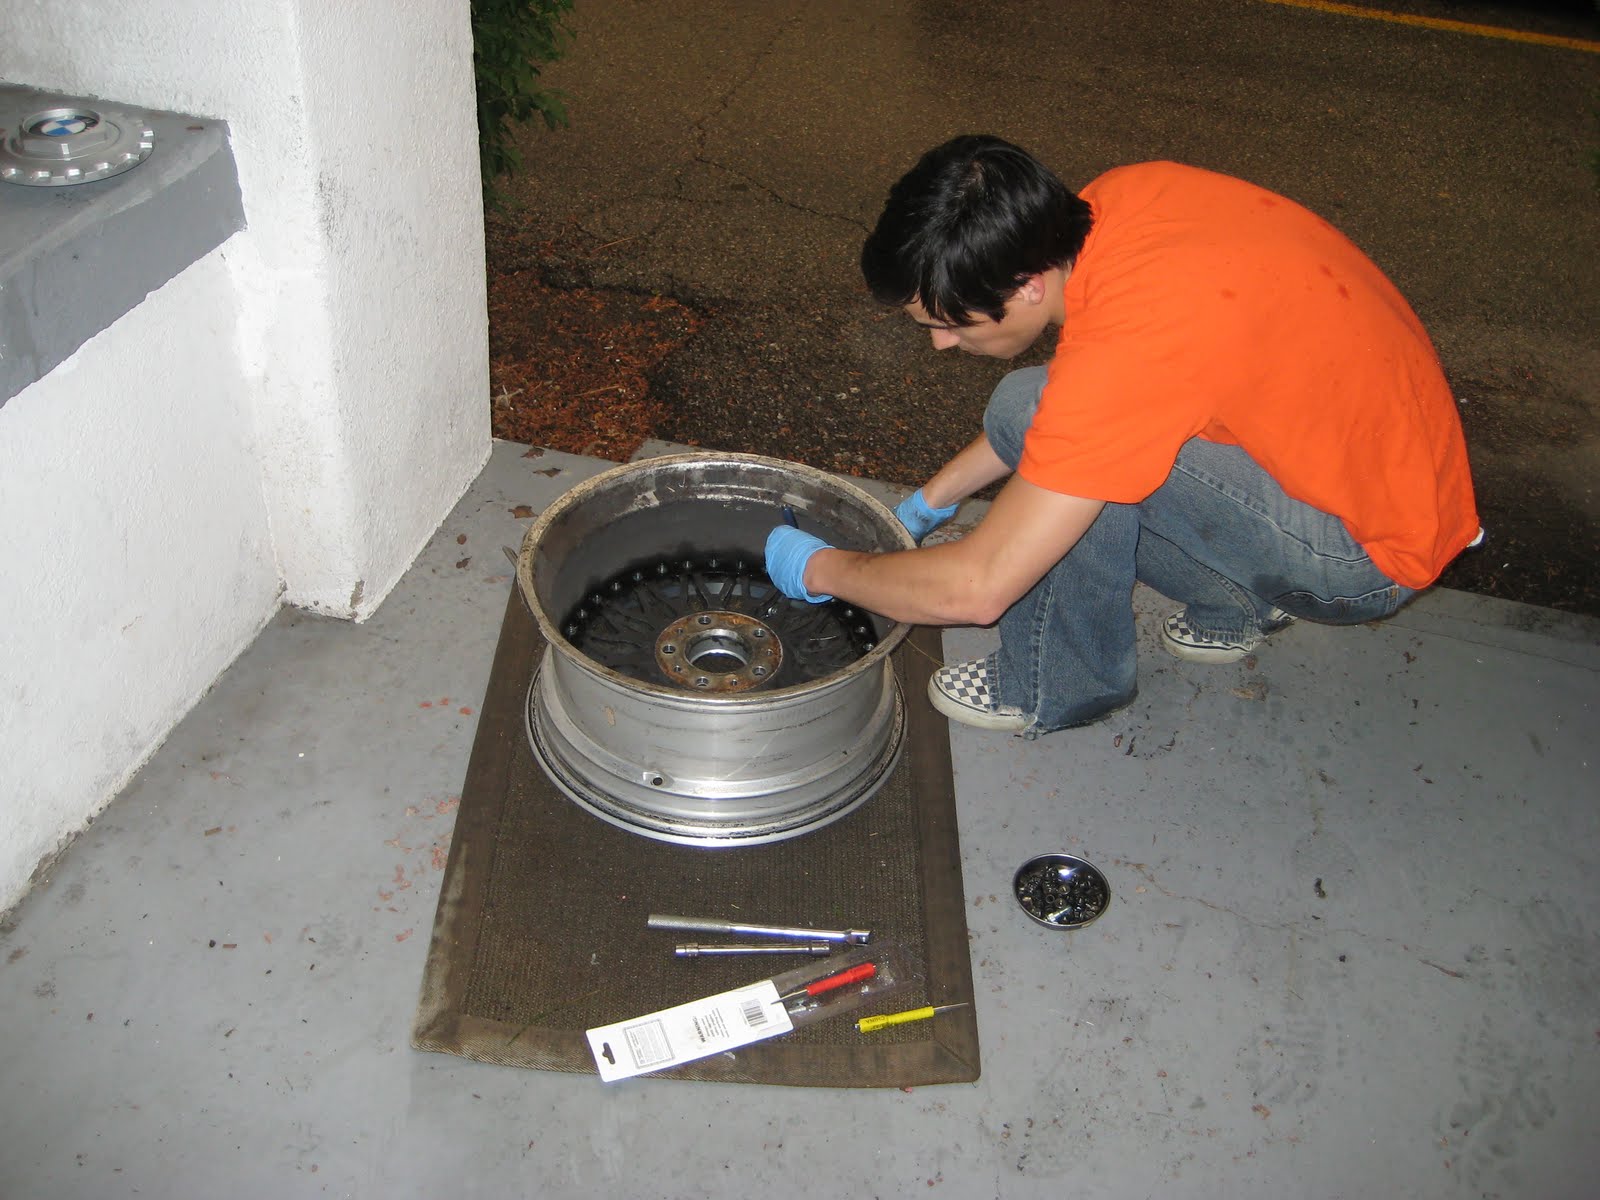

Now that you have all the nuts off, you can remove the bolts. You do this by placing a nail punch (blue was the best size for the job), or old Torx screwdriver on the end of the bolt. I thought it was nice that the bolts had an indentation on the center. This kept the punch from moving around or sliding off as I struck it with the hammer. Don't be bashful. These bolts are much like the nuts that you removed, they take a little more effort at times.


This is where the phone book comes in handy. Since Rachel and I look online to find contact information now the phone book has been gathering dust on the refrigerator. Once all the bolts and nuts are removed from the wheel place the wheel on a padded surface, like the rug I was using, facing upwards. Position the phone book on the center of the wheel. Now you can give the center a good smack to separate the two without damaging your centers. I tried and tried with a rubber mallet with no success. I have also read different accounts of people using presses, sledgehammers, and heat guns. All of this sounds a little over-kill, but they weren't the easiest things to remove.


Now get ready to roll up your sleeves. My wheels were caked in over 4mm of brake dust. It was over everything. The centers, nuts, bolts, and the inner portion of the wheels. After a lot of scrubbing I was able to clean them up a bit.


They look pretty good now. But the plans are to polish the lips, replace the bolts and get rid of the curb rash.


DIY: Modena Vader after Leatherique Treatment


I conducted a search to find the best products to recondition leather products. During my search I stumbled across Leatherique products. I was intrigued and decided to give it a try. Here are some pictures to document the restoration.

Before:
As you can see the seats were pretty nasty. Rachel and I decided to drive out to Denver to pick up these seats and upon arrival found them in a filthy garage so we knew we were going to be cleaning them right away. These pictures as of the work done on the passenger side Vader seat.


During:

After:


I thought the seat cleaned up really nicely. It was a relatively easy process, but time-consuming.
It was well worth all the work for the nice clean smell of the leather after the cleaning process was over, as well as getting rid of the sheen across the surface of the leather.

Friday, April 24, 2009


Picture of the cars before the end of the semester and before there seperation for the summer.

Thursday, April 24, 2008

Mass Exodus and Mirrors

So, my brother and sister left last night for home to make some money before the start of fall term next year. I was pretty bummed because that meant that not only was Kyle moving, but Christopher was too. I would have loved to have gotten all the parts on my car before they left just so we could go on a cruise and take some pictures. Plus, now I don't know who to talk BMW with. My wife is getting really good at just agreeing with my fanatic ramblings.


Before Christopher headed off I wanted to make sure that I got the mirrors. They look amazing! I wish I had done it much earlier. The power works great, and the paint matches beautifully, thanks to Kevin at KC's Bend 'n' Mend. It will take a little while to get used to the littler mirrors, but the convex lens towards the outside of the mirror (a european M3 feature) makes it easier to see objects in a more peripheral position than the US M3 mirror offers.

A lot of work for .75" of drop

Yesterday I helped Kyle lower his car. He chose to put H&R OE Sport Springs on his M3 to bring it modestly lower. In order to do this Kyle also had to purchase '95 M3 strut hats and rent strut spring compressor. With all of my tools, a little elbow grease (provided by Kyle's gym membership), and an occasional reference back to the insufficient Haines manual, we got it all put together. I think it looks great--although Christopher's Estoril is still lower. It was a lot of fun putting the suspension in, especially since it was...
  • the last day of finals,
  • the day my brother and sister were planning to drive home for the summer,
  • no one seemed to have a spring compressor in stock,
  • and a handful of really good friends dropped in to say hi unexpectedly.
I have some pictures here to chronicle the momentous occasion for Kyle. Plus, now he can lower his wife's car.

All-in-all, it took us from 2:45p-5:45p. (That was the time that my last final was, and thus the deadline for working on bimmers.) Things would have gone a little faster if I had remembered how it disassemble the strut like I had done with Chase's '92 318i. At the end the drop was much lower than the original stock springs. He took it on a test ride to make sure that all the parts were going to stay on the car, and to bring me up to my final. Kyle noted that there was a noticable difference in the way that the car rode. I believe him, although it could all be in our heads from working in a wheel well for the last three hours. Regardless we all enjoyed ourselves.


Tuesday, April 22, 2008

Back from the paint booth!!

I have collected parts when I have found them for a great deal. Over the years I have gotten...
  • M3 "Twisty" Side Skirts (Euro-Spec)
  • M3 Mirrors (Euro-Spec)
  • M-Tech front bumper with removable lip (DDM Tuning)
  • M-Tech rear bumper (DDM Tuning)
  • Fog Light Deletes (courtesy of Chase)
  • 96-99 Nose Panel (courtesy of Kyle)
Well, it's been a long time coming, and a nice chunk of front bumper started the whole thing. All the parts went into the paint shop just this last week. And as a great scheduler, it has fallen right during finals week. I have been able to get to the booth and have gotten sufficient amounts of studying.

Here are the before, during, and after shots.

Before:


During:


After:


I was very pleased with how they turned out. I still have to go back to the shop to get a couple runs and imperfections cut. In a couple of days I am planning on getting together with Kyle to help him install his new suspension on his '97 Dakar M3. I might try to snag him and have him help me install the lip, bumpers, and drill for the side skirts.

Thursday, April 17, 2008

The Best E36 Interior Shot I Have Seen Yet

I have to promise myself that I will not browse the internet for BMW things so that I can focus on my upcoming finals. I have found that when I tell my wife I will do something, it happens. Last night she left for the grocery store. Before she left I told her, I will not browse anything other than "The ethical implications of placebo-based clinical trials." She smiled. Then I stated, "unless Christopher sends me a link." I struggled through three journal articles. Then... Christopher delivered. He sent me a link to craigslist.com in San Francisco. Here are some of the best pictures my eyes have beheld of an E36, mostly the interior.

To learn more about Brad visit his website at bradthephotog.com.

Thursday, April 10, 2008

The last and ultimate mod: The M3 Sunroof!!

The last couple of days of the semester does something funny to a person. For my brother and I we spend a lot of time in the library. To escape from the mundane studying we browse around craigslist. This entails hunting for parts, wheels, and gags. Just tonight we stumbled across this beauty... which has spurred a new blogging post entitled "The Last and Ultimate Mods."

From Seattle:
http://seattle.craigslist.org/see/car/638117222.html
I can only imagine what this guy was thinking...

Does anyone know where I can get me one of these?

I have the blue flame racing seat covers. I have the 'tainted windows', and 'spedometer' to boot. I thought that the 'brand new teirs' would tip me over the top. But, it was nothing until I got the M3 sunroof.

The M3 sunroof has got to add a ton of horsepower.

Wasatch Drivers


Kyle just recently started to get involved "poasting" on a local forum, "Wasatch Drivers." It is really interesting to read about the happenings from the local members. I really get a kick out of all the diverse personalities that join together because of a love for their fine automobiles. One things that really blew me away were the pictures that they were producing. I could not believe some of the pictures that I saw. I am hope they are okay with me posting a couple of their shots.

Wednesday, April 09, 2008

Is it worth it?


Well, now that the M-technic body parts are all in the auto shop and ready for paint I started to look for the finishing touches to the exterior of the boston green. I purchased a LTW Motorsport flag (you can see what the flag looks like at this earlier post). The lights are great for now... in fact, I experimented with my extra set of HID's and the fog lights. I got them to wire up correctly, but I learned that although both bulbs are fine, one of the ballasts is shot. The only things that I have left to do is lower the car. Then I am done... Then I could use a sweet set of wheels to perfectly accent the M3 look and feel to the exterior. Then I would be done for sure... But, then I would need to tint the windows, so that others could not see inside the car to see if it really was an M-technic or an M3. Then for sure I would be done. Or, then I would continue to put all clear corners on... and lastly a UUC adjustable spoiler. No matter how I look at it. The modding will always continue until I will eventually get rid of the car. It is inevitable.

Wednesday, April 02, 2008

The Look for a New Wallpaper has ended... BMW Unveils the Race Version M3


CHICAGO — The racing car, prepared by BMW M GmbH, features a P65 motorsports version of the M3's 4.0-liter V8, boosted from 414 to 485 horsepower and from 295 to 368 pound-feet of torque. The engine is mated to a six-speed sequential racing transmission with a carbon-fiber clutch and a mechanical limited-slip differential.

The chassis also has been race-tuned. The track has been widened, and the car is fitted with five-way adjustable shocks and tubular stabilizer bars front and rear, as well as oversize brakes and 18-inch racing tires mounted on alloy wheels.

BMW has lightened the car through extensive use of carbon-fiber-reinforced plastic for the hood, roof, deck lid, front fenders, rear wheel arches, rear apron and rear wing. Curb weight is 2,535 pounds.

The company has enlisted such development drivers as Andy Priaulx, Jörg Müller and Augusto Farfus to test the car before its competition debut in 2009.

What this means to you: We're hoping some of the performance mods on the racing car trickle down to the street version of the M3. — Paul Lienert, Correspondent

This article was taken from Edmunds.com, and can be found here.

Thursday, March 27, 2008

Tuning on a College Budget


After four years of searching the wait is now over. DDM Tuning has offered an E36 M3 bumper for $112.25. I would definitely recommend checking out their website (click here to learn more). And I, needless to say, am jumping on the bandwagon for this one. Plus, I found out that I can replace my non-M3 front bumper and also get an M3 rear bumper for a better price than just to replace my front bumper with an aftermarket 3-series one. This will transform the exterior of my car from a 3-series to a Boston green M3. While I was at it I am replacing the fog lights and adding Lamin-X to insure that they will be around for longer. My brother is up-dating his headlights on his estoril M3. This means he is adding DEPO brand glass headlights, with 6000K HID's and installing angel eyes. He will also use yellow Lamin-X on the fog lights to turn them into French fogs. I can't wait. The shipping arrival of the bumpers is March 31.